
Topstitching can be very scary. Even though the technique can truly add a touch of professional finish to your garments, if badly done, it can also lower the quality of the finished project drastically. And with all the time and energy we spend on sewing clothes, it’s a shame to have it all ruined in the end!

For some, it can even come to the point of avoiding doing visible topstitching all together.
But if you find yourself in this category, know that you’re not alone! Fortunately, there’s a few tips and tricks you can practice to elevate the quality of your finished garments.
So today we're sharing helpful methods to help you get better results when topstitching.
Finding the right supplies
The first thing on the list is to find and use the right supplies. While you can absolutely topstitch with your regular sewing thread on most projects, when using heavier fabric you usually want your topstitching to show more and be stronger. It’s the case when sewing a pair of jeans or a coat, but it can also be a decorative way of finishing a garment with lighter fabric. If that’s the style you’re after, then using topstitching thread which is slightly heavier than regular thread is recommended.

Whatever you choose, know that the tips and tricks in this post will apply to any thread you end up using.
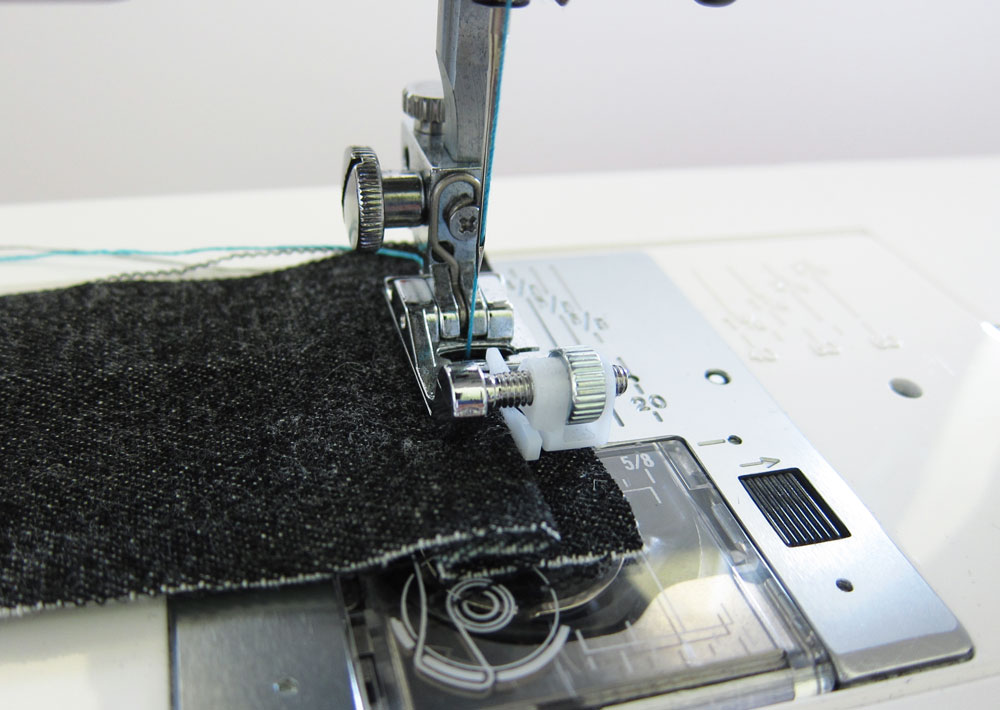
Sewing with topstitching thread
If you plan on using the thicker thread, you'll also need on some heavy duty needles. When you think about it, the projects that requires a lot of visible topstitching are made of quite heavy fabric, so a needle that can pierce through several layers of fabric will make the job a lot easier. Also, usually, these needles have a bigger hole for the thread, so they are just what we need!
If you’re having trouble locating this heavier topstitching thread in your haberdashery, you can ask for "topstitching" or "cordonnet" thread.

Note that when sewing with it, you'll use it only on the top part of your machine. For the bobin, you'll get better result with using a standard thread of the same colour.
Remember also that chances are you'll have to adjust the tension of your machine. Generally, the normal tension setting is 4, but in order not to have the topstitching thread show under the seam, you might have to go up a couple of numbers to a 6 to get a better result.
Sewing more accurately
Now let's talk about accuracy, the big scary thing about topstitching!
Being a decorative and very visible seam (and more so if you use a contrasting colour!), if it’s not stitched straight, it’ll look poorly made. However, there’s a solution to help you be more accurate when topstitching and that's when an adjustable sewing foot comes in handy!
An adjustable blind hem foot, or an edge foot is your best friend in this case. It'll allow you to accurately follow the seam edge creating a perfectly straight line. Just adjust the width of the foot (or adjust the needle's position) and you'll be amazed at how close you can now easily stitch next to the seam line.
Other options for better accuracy
However, there’ll always be a time when such a miracle attachement isn't an option. When this happens, it’ll need all the help you can get to be accurate. That means either drawing the stitch line with chalk on the fabric or adding a guideline with a indelible pen directly on the sewing feet.

See the dark mark on the zipper foot below? That's a drawn guide to help follow either the edge, or in this case, the previous row of stitching. Very easy to do and so helpful in a lot of situations, when you're done, you can simply whip away your mark with a bit of pure alcohol and none will be the wiser.
Solving problems due to fabric thickness
Do you get frustrated when your fabric didn't seem to feed correctly at the start of a line and ends up making a mess of your topstitching? Or maybe you’ve tried attach pockets at the back of a pair of jeans just to keep having the needle being stuck when sewing the corners? Very frustrating!
The cause of these problems is simple: when sewing through multiple layers of fabric, your machine will have some difficulty starting sewing because the presser foot isn't levelled. Another way of seeing this would be to imagine your presser feet having to climb a hill before even starting to sew, not easy.

To help it do its job neatly, the solution is to add some fabric under your sewing feet so it’ll be levelled with your seam. Your machine won't refuse to sew anymore, you've just outsmart it!

Practice makes perfect!
Like with every new thing you learn, practice makes perfect. So don’t be too hard on yourself if you don’t nail the perfect seam at first, with these tips and after a few tries you’ll see that you’re getting better little by little.
One of the big secret of topstitching, the thing that will make all the difference, is to do trial runs. Like pretty much any technique, it's always a good idea to check if your settings are correct.

Doing some tests beforehand is also a great way to test the stitch length and the distance between the seam and the topstitching. Adjusting this according to the fabric and thread thickness will produce a smoother and overall more balanced seam. Feel free to experiment to find the perfect stitch length, in general 3 or 3.5 mm long work great.
Take notes
And finally, after learning all these new tricks, remember to take notes! When you do these kind of experiments with new or less used technique, get into the habit of recording every settings and things you did to achieve the result you wanted. That way, all that trial and error part will be learned and ready for your next project!

That's it! Hope you could benefit a little from all the problems I kept having with topstitching.
Now all of our makes will look like designer pieces!